How to Set Up and Accept Payments
Home – Work with me – Blog – Coachleads Tutorial – How to Set up and Accept Payments
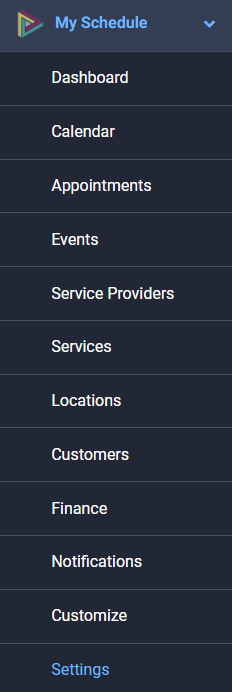
Step 1: To Integrate Google Calendar on your account, you will need to navigate from your dashboard to Sales then go to Appointments and select Settings.

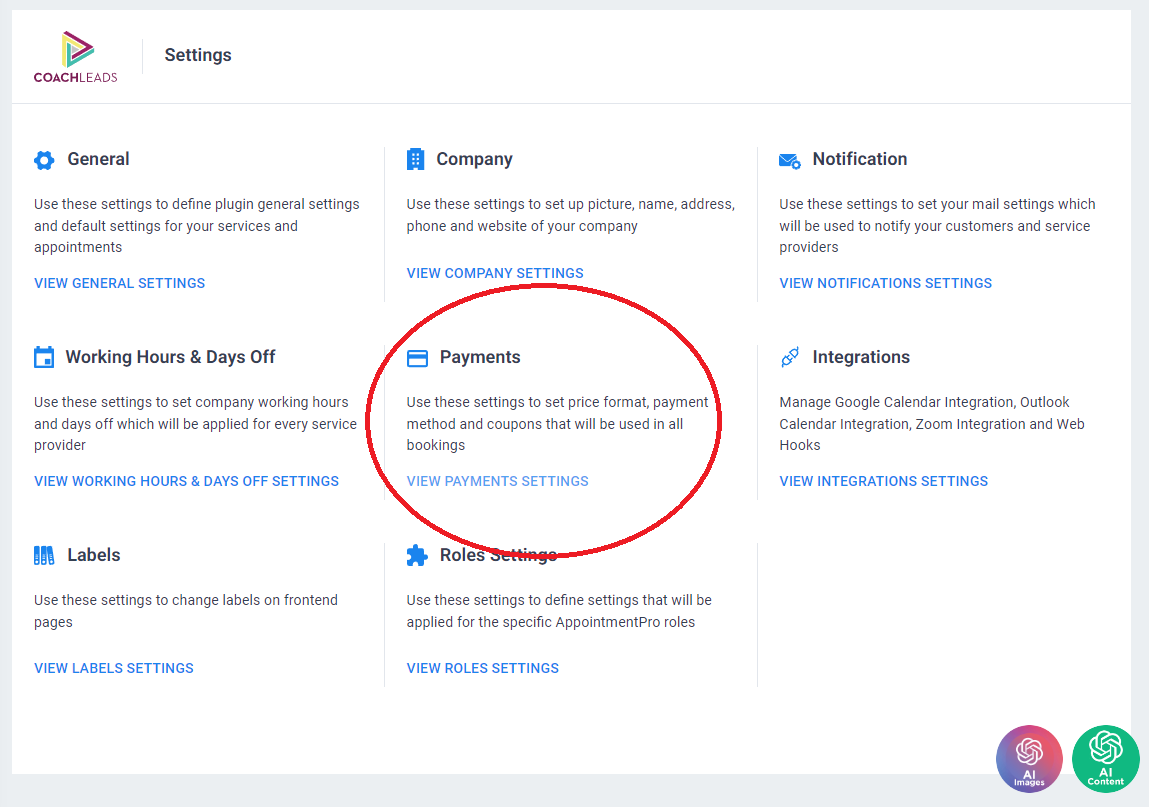
Step 2: From Settings, select Payments by clicking View Payments Settings.

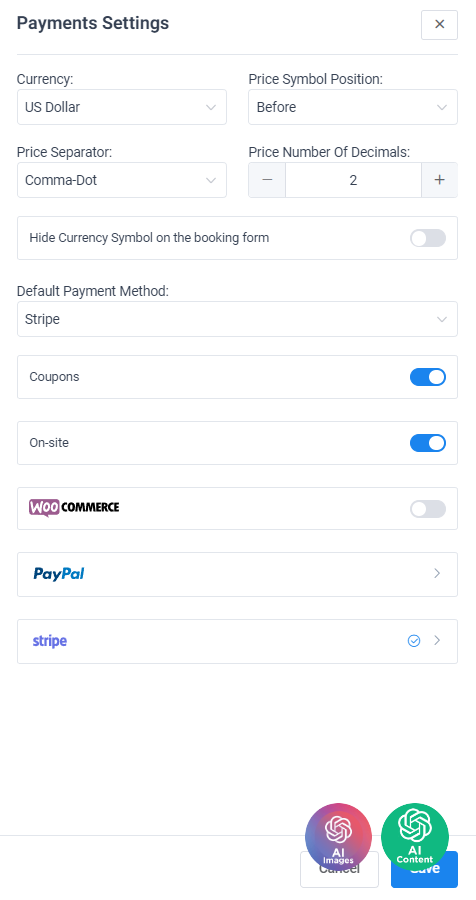
Step 3: In order to Set up and Accept Payments, you will need to enter the following details:
- Currency – Allows you to select what type of currency that you will accept in payment transactions.
- Price Symbol Position – Allows you to modify the Price Symbol of the currency that you have selected.
- Before – Example: $100
- Before with Space – Example: $ 100
- After – Example: 100$
- After with Space – Example: 100 $
- Price Separator – Allows you to modify the Price Comma and Dot of the currency that you have selected.
- Comma-Dot – Example: 15,000.00
- Dot-Comma – Example: 15.000,00
- Space-Dot – Example: 15 000.00
- Space-Comma – Example: 15 000,00
- Price Number of Decimals – Allows you to modify the number of decimals in the price of the currency that you have selected.
- Hide Currency Symbol on booking form – Allows you to hide the currency symbol on your booking form.
- Default Payment Method: Allows you to select a default payment method of your payment transactions.
- Onsite via Stripe – You can accept payment through our website via Stripe.
- Stripe – Stripe is a suite of APIs powering online payment processing and commerce solutions for internet businesses of all sizes. Accept payments and scale faster.
- WooCommerce – WooCommerce is an open-source flexible software solution built for WordPress-based websites. It’s commonly used to create online e-commerce shops.
- Paypal – PayPal is an online payment system that makes paying for things online and sending and receiving money safe and secure.
- Onsite via Stripe – You can accept payment through our website via Stripe.


Recent Comments